
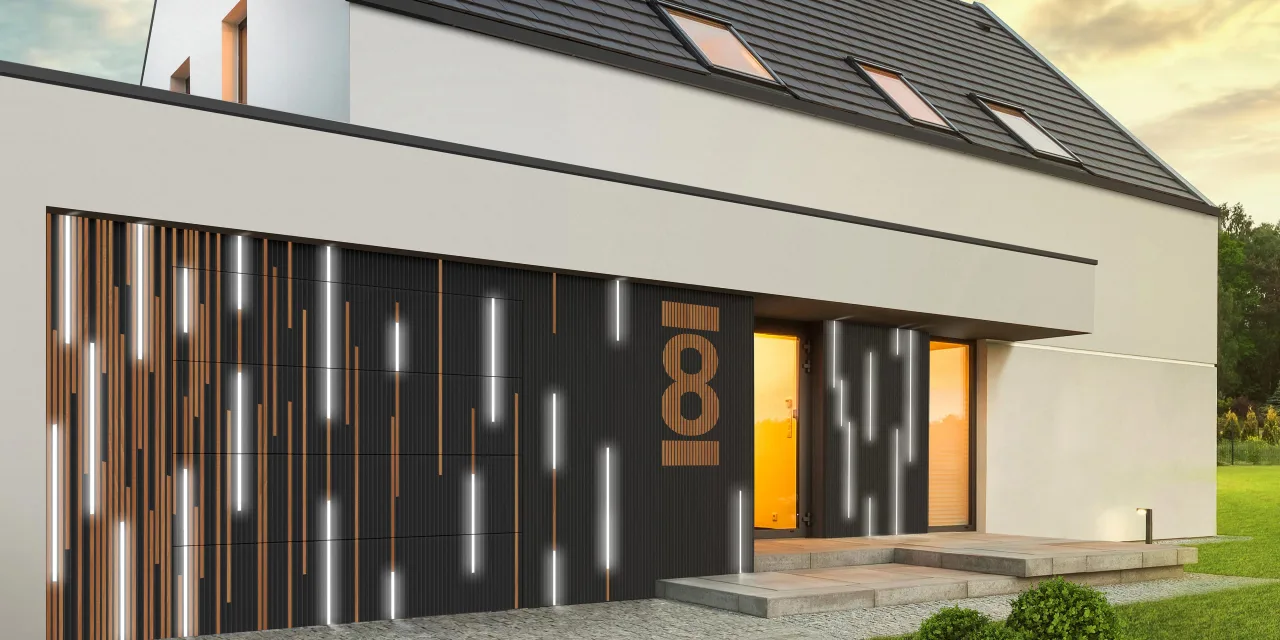
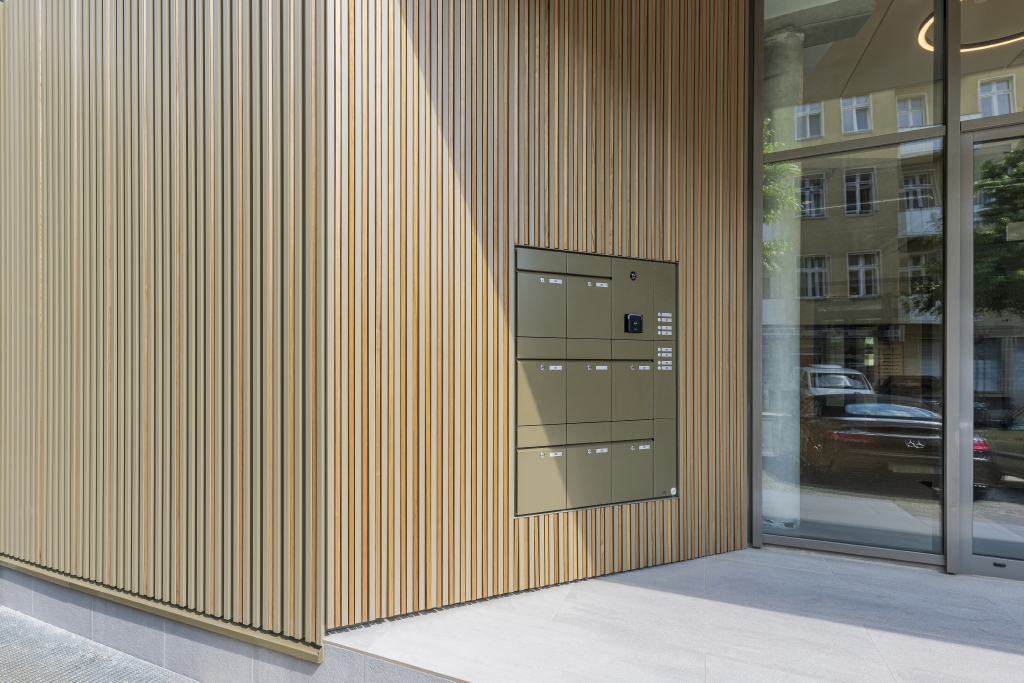
Linarte residential house in Berlin
Wall cladding with Linarte in the Gürtelstraße in Berlin
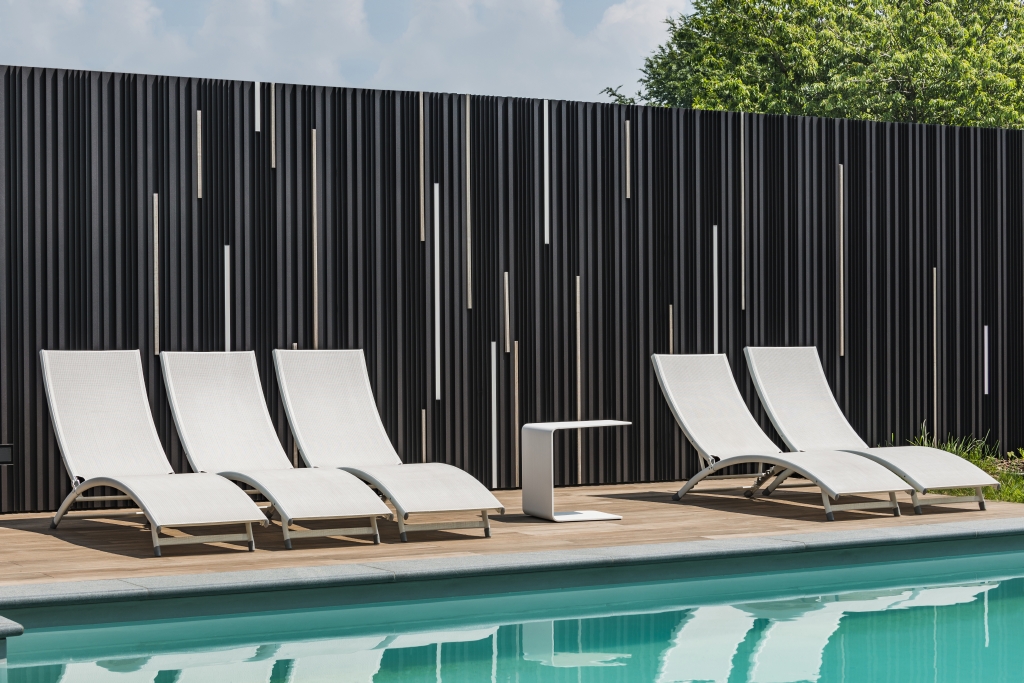
Linarte cladding of a wall
Cladding of a wall in a sauna establishment
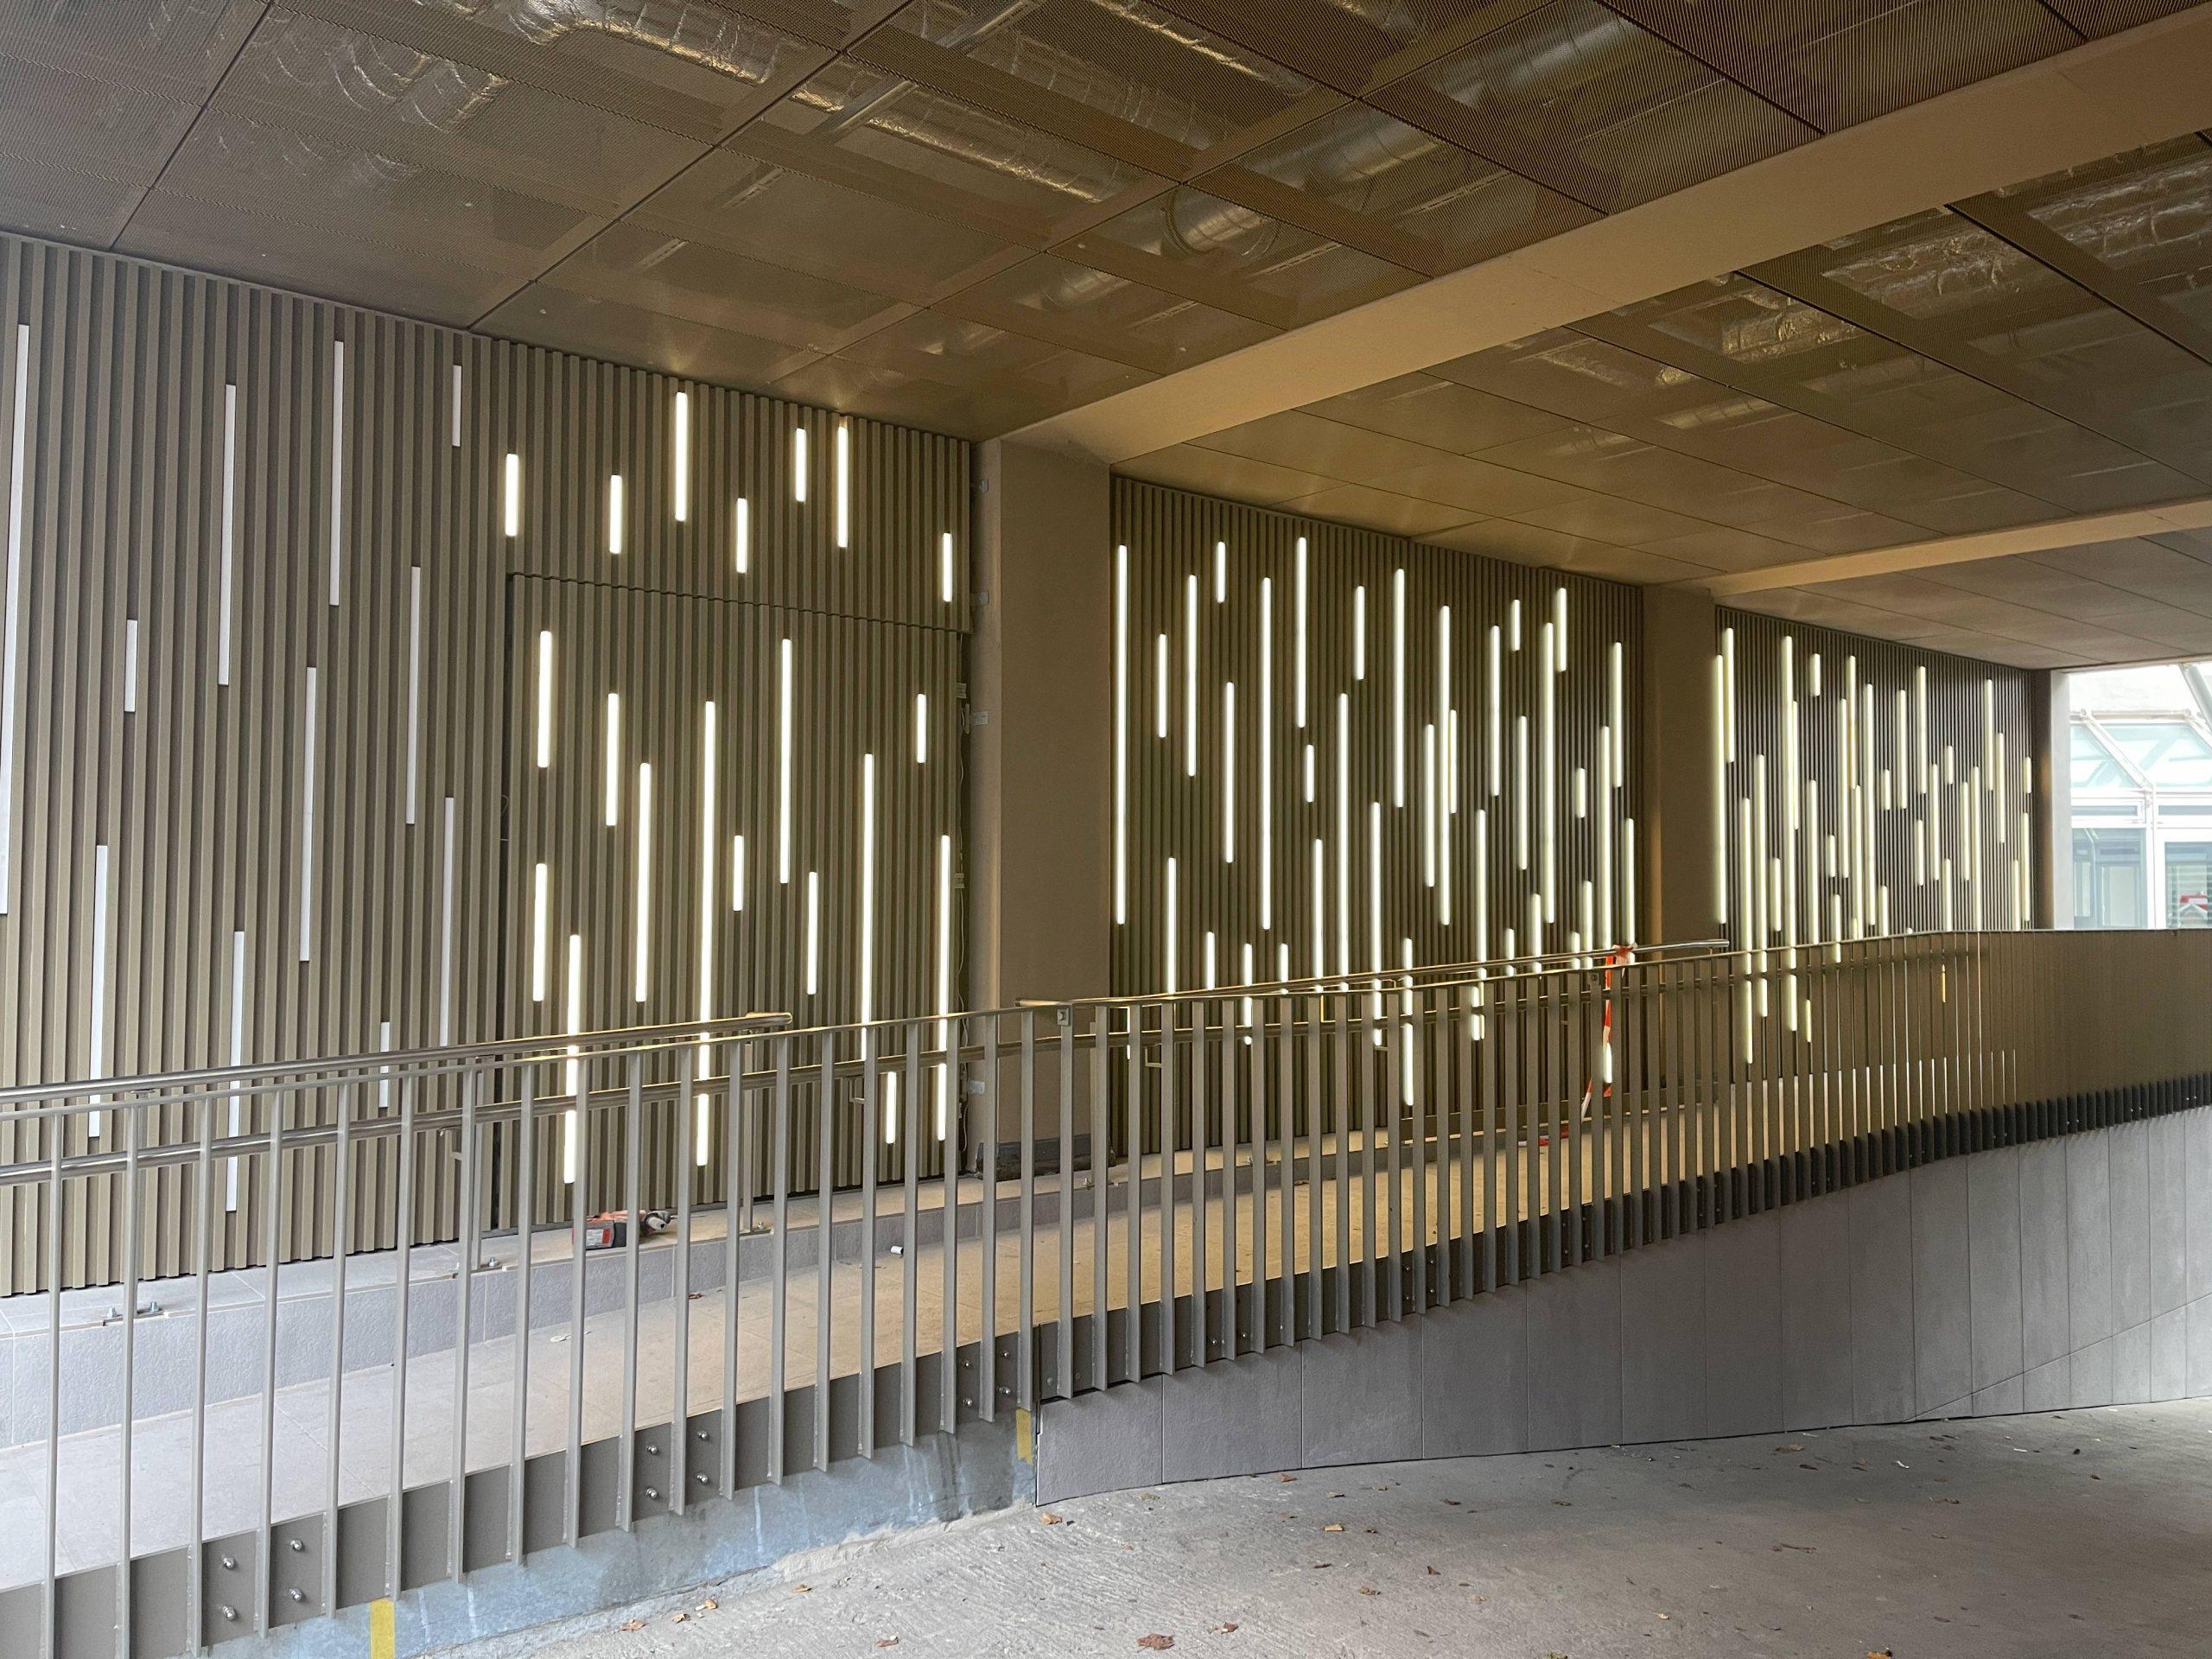
Linarte LED slat wall
Linarte wall panel with LED lighting
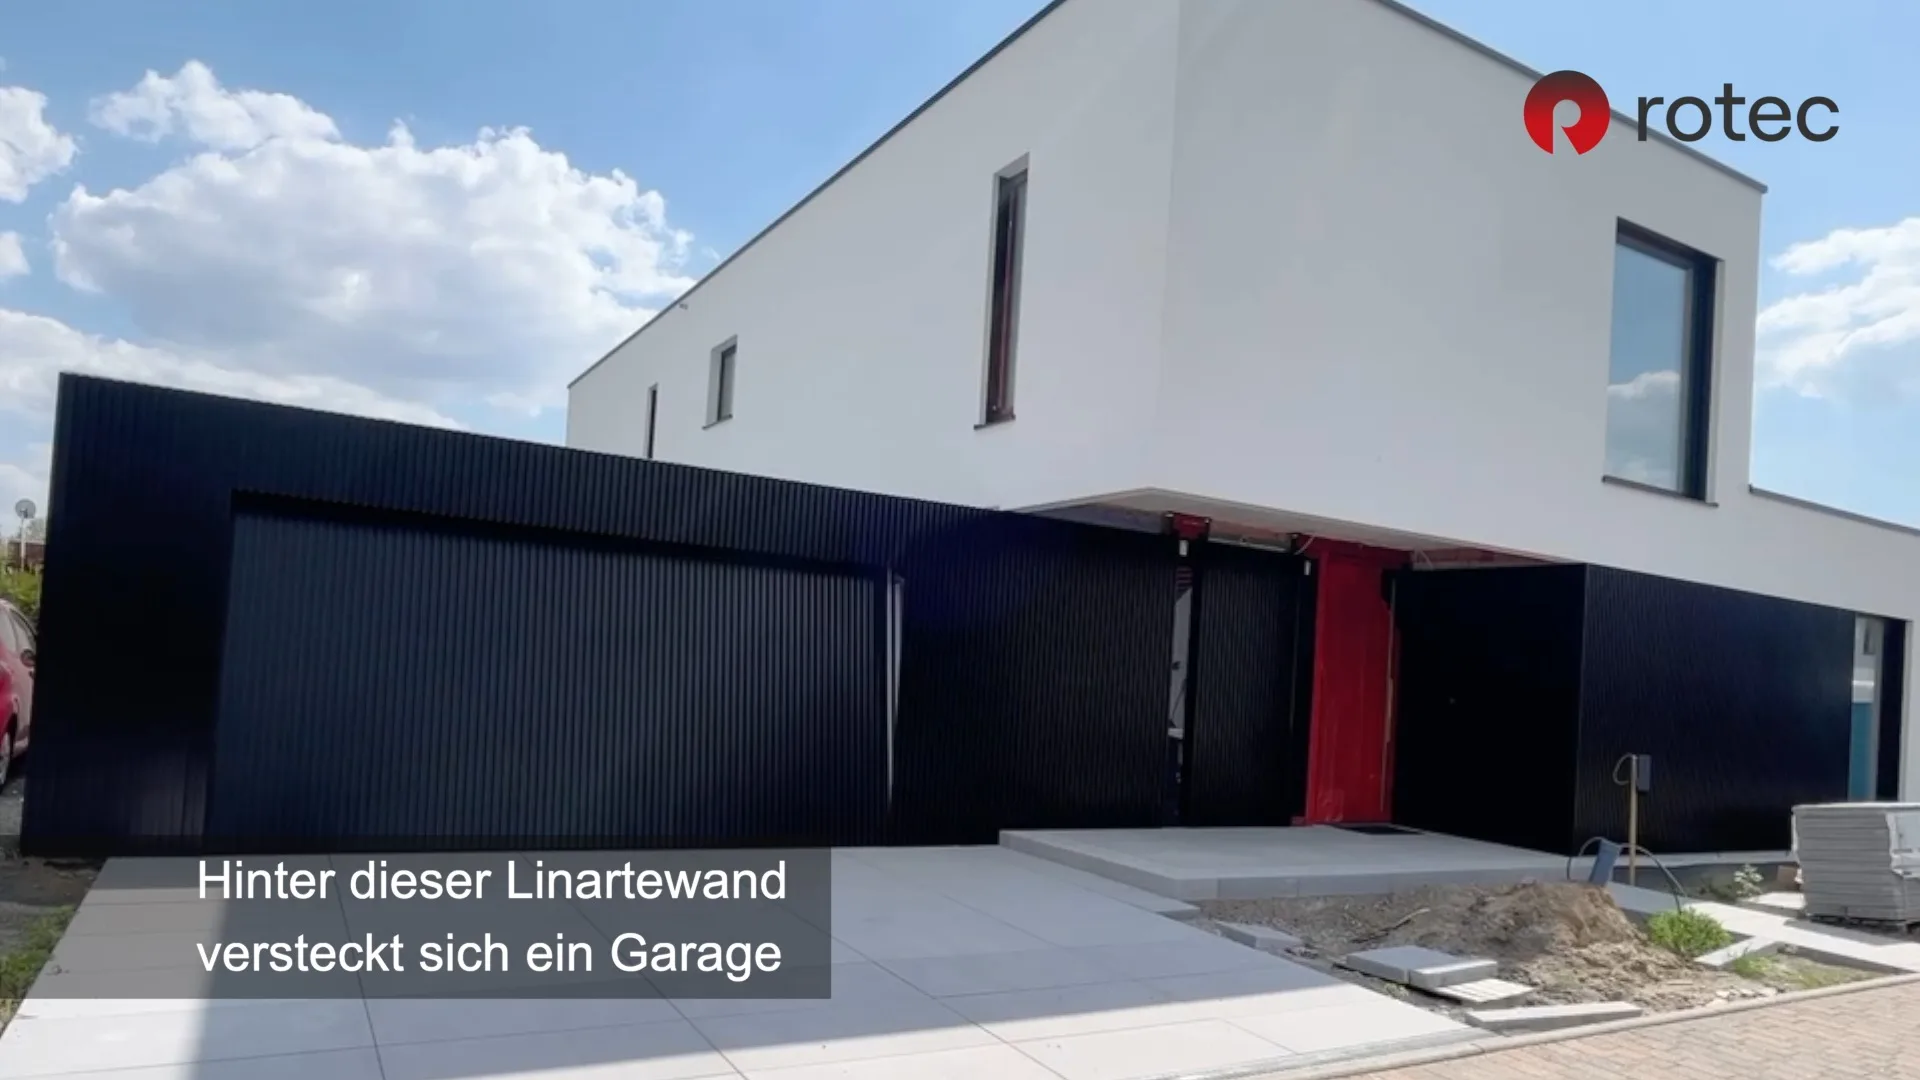
Invisible gate cladding with Linarte profiles - mounting cladding
Quick Start Guide for LINARTE: The Key Points in Two Minutes
If you want to quickly check whether your project is running smoothly, use these points. They are intentionally brief so that you can incorporate them directly into your project communications. If you’re still missing any specific details, make a note of them and clarify them before issuing the request for proposals.
- Define the target design—that is, a clean, linear look and integrated openings: yes or no.
- Define the profile family and grid logic for main surfaces and accent zones.
- Determine the wall construction, including the substrate, insulation, waterproofing, and penetrations.
- Design the substructure, because fastening and tolerance compensation depend on it.
- Plan for rear ventilation so that moisture can dry out and the building envelope remains stable.
- Specify details—such as the base, parapet, corners, and soffits—as a standard solution.
- Define openings—that is, doors, gates, joint logic, and movement zones.
- Coordinate electrical components and accessories if LEDs or inserts are to be installed.
- Clarify installation access and logistics, including the schedule and interfaces.
- Firmly establish acceptance and documentation procedures so that quality remains verifiable.
LINARTE: Definition and Benefits, in Clear Sentences
LINARTE It is a vertical cladding system made up of individual profiles that are assembled to form a smooth surface. You can use it to add texture to exterior walls, and you can also use it to design interior walls. Its appeal lies in the fact that the lines appear very precise, and that many details can be integrated into a clean grid.
What is LINARTE, and what is it used for?
LINARTE It is used when you want a high-quality wall or facade appearance that is structurally sound. It works well with commercial and industrial buildings, as well as with sophisticated architectural projects. It is also often chosen because openings can be made to appear less prominent when doors and gates blend seamlessly into the surrounding surface.
LINARTE for Industrial Buildings: Why It Works in Practice
In industry, functionality, maintenance, and repeatability are what matter. At the same time, you often want a quiet environment, even though there are technical areas present. LINARTE This can help because it allows you to clearly structure zones and standardize details. However, a clean substructure is essential, and you also need clear interfaces between trades.
LINARTE Variations and Design Impact
The effect is created by the profile geometry, the pattern, and light. Depending on the variant, the shadows can be more subtle or more pronounced, making the surface appear calmer or more striking. It’s important to decide on the variant early on, because corners, soffits, baseboards, and parapets depend on it.
- Lattice Logic: Even, if you want maximum tranquility, and clearly defined along distinct edges.
- Highlighted Areas: Entrances and special areas that still fit within the overall grid.
- Standard Details: Repeatable solutions for openings to make inspection and maintenance easier.
Which LINARTE model goes well with a simple facade?
If you want a very calm surface, a consistent rhythm and a clear defining edge will help. You should also define the connection details early on so that the grid isn’t altered on the construction site. If you need to add accents, you can vary individual zones while still keeping the basic grid stable. rotec supports you in ensuring that design and installation work together seamlessly.
Key Technical Considerations for LINARTE: What You Should Clarify in Every Planning Phase
Many problems arise when technical fundamentals are lacking. That is why this section is intentionally concise and practical. If values are project-specific, they are intentionally omitted here, as they must be determined by structural analysis and the subgrade.
- Background: Concrete, masonry, steel construction, or insulated structures, depending on the project.
- Substructure: Determine the layout and center distances on a project-by-project basis; these are not fixed values.
- Rear ventilation: Concept required; minimum dimensions are not specified as a fixed value.
- Wind Loads and Structural Analysis: Proof required; key figures not provided in the article.
- Tolerances: Define reference edges and offsets; values are project-specific.
- Openings: Define doors, gates, and penetrations early on.
- Electrical and LED: Define cable routing and maintenance access.
- Care: Define the cleaning logic for the location; set intervals on a project-by-project basis.
What information is often missing, and what specifically should you add?
Wind load assumptions, fastening spacings, and substrate values are often missing. In addition, details regarding the base and parapet, as well as a drainage plan, are missing. Clear lines of responsibility between the structural steel, electrical, and waterproofing teams are also frequently lacking. If these points are not specified, you should ensure they are formally added before construction begins, as otherwise costs and deadlines will come under pressure.
Detailed Considerations for LINARTE: Baseboards, Parapets, Corners, Reveals, and Penetrations
Quality is evident in the details. If you cut corners here, the appearance suffers, and maintenance becomes more difficult. That's why it's worth getting approval early on—before manufacturing or ordering begins.
LINARTE Base Detail: How do you protect against splashes and dirt?
The baseboard is exposed to dirt and mechanical stress. That’s why you need sturdy trim and a well-defined drip edge. In addition, proper airflow must be maintained so that moisture can dry out. If the baseboard isn’t installed correctly, the surface will become uneven more quickly, and maintenance will also become more difficult.
LINARTE Parapet Detail: How can the top edge be made secure and stable?
The parapet is all about water drainage and wind. You need a finish that allows rainwater to drain away and doesn’t block rear ventilation. At the same time, the top edge should remain straight, because any deviations there are quickly noticeable. If the parapet and waterproofing aren’t properly coordinated, it will lead to rework later on.
LINARTE Corners: How do you keep the lines clean?
Corners are visible, and they must align with the grid. That is why inside and outside corners should be determined early on. It is important to have a clear reference edge so that profiles begin and end logically. This keeps the corner clean, and the facade appears seamless.
LINARTE Window Jamb: How Do You Plan the Connection Professionally?
Window reveals require defined finishing profiles and defined joints. In addition, movement must be taken into account to prevent anything from getting stuck. If you have many openings, it’s worth using a standard detail because it can be implemented more quickly. A clear reveal design reduces disputes and streamlines the inspection process.
LINARTE: Penetrations and Techniques—How Do You Avoid Having to Do Re-work Later?
Interferences must be identified early on because they can disrupt the grid. That’s why you should identify and coordinate technical issues. You should also consider maintenance access to ensure that operations and service remain possible. If this is planned properly, the need for changes and retrofits will decrease significantly.
Subframe and Mounting in LINARTE: Why That's Half the Battle
The substructure forms the foundation of the entire surface. If it is not installed precisely, the lines will appear uneven. It also determines how tolerances are accommodated and the air gap behind the cladding.
LINARTE on insulated structures—what must be clarified?
For insulated roof structures, you need a fastening system in the load-bearing layer. In addition, thermal bridges and pressure points must be checked. Structural and building physics analyses are required, and specific values are not available here because they are project-specific. If you do not request these analyses, the risk of delays increases.
How do you design rear ventilation so that it actually works?
Ventilation refers to air movement behind the cladding. To achieve this, you need designated intake and exhaust areas, and you need a free air layer. In addition, you should provide structural protection against dirt and small animals. If there is no air circulation, the risk of moisture problems increases, and durability is reduced.
Integration of Doors, Gates, LEDs, and Accessories into LINARTE
A major advantage is the ability to integrate functionality into a smooth surface. This creates a high-quality look and reduces visual disruption in the facade. However, clear design details are essential; otherwise, operation and maintenance will be compromised.
Installing a LINARTE door—what do you need to decide beforehand?
You need to decide on the handle, lock, and opening direction. You also need to define the joints and stops so that the door remains suitable for everyday use. If these details are missing, it can lead to visual inconsistencies and functional problems. That’s why door integration is a planning issue—not just a matter of installation.
Integrating a LINARTE gate—how can we ensure it remains reliable during operation?
When it comes to doors, guides, seals, and movement zones are crucial. You want a consistent look, but nothing should interfere with anything else. That’s why door planning should be coordinated early on with the grid and substructure. If you wait too long to do this, the grid is often changed, and that becomes noticeable later on.
When integrating LINARTE LEDs, how do you plan for maintenance from the start?
LEDs require wiring, protection, and access for maintenance. That’s why you need to determine early on where the equipment will be located and how service can be maintained. In addition, the interface with the electrical design must be clearly defined. This will help you avoid visible retrofits and unplanned openings.
Planning and Bidding for LINARTE, So You Have Fewer Change Orders
A well-written request for proposals reduces risks. That’s why you should not only specify the variant and color, but also define details and interfaces. The more clearly the scope of work is described, the more stable the construction process will be.
- Define the variant and grid logic.
- Define color and surface requirements.
- Describe wall construction and insulation.
- Define plinths, parapets, corners, and reveals as details.
- Coordinate openings and penetrations.
- Describe doors and gates, including their joint logic.
- Define electrical and LED components, including access for maintenance.
- Have the substructure and fastenings verified for structural integrity.
- Determine the access point for installation, logistics, and the schedule.
- Require a handover, care instructions, and documentation.
Tender documents to copy, ready to use
You can include the following sections in your request for proposals. Add project-specific details as soon as they are finalized. If any information is missing, write “not available” and request it before work begins.
Module: Scope of Services and Objectives: Delivery and installation of a vertical aluminum wall and facade cladding as a turnkey solution. The goal is to achieve a clean, uniform linear appearance with a defined grid pattern. The scope of work includes the substructure, connection profiles, and detailed designs in accordance with the approved drawings. Interfaces with the building shell, waterproofing, electrical systems, doors, and gates must be coordinated and documented in writing.
Module: Measurement and Approval Designation: Prior to execution, measurements, reference edges, and the grid must be confirmed in writing. The contractor shall prepare an approval drawing showing the grid, profile alignment, corners, soffits, base, and parapet details, as well as penetrations. Production and installation may not begin until written approval has been received from the site management.
Module: Substructure and Structural Analysis: The substructure and fastening must be adapted to the existing substrate. Structural and building physics requirements must be met. Documentation verifying fastening, load transfer, and tolerance compensation must be submitted prior to installation. Fastening spacings and center-to-center distances are determined on a project-by-project basis.
Rear Ventilation Module: The structure must be designed as a ventilated cladding system. The entry and exit points of the air layer must be designed to allow moisture to dry out. Openings must be structurally protected. The airflow must not be blocked by connection details.
Doors and Gates Module: If doors or gates are to be integrated, the joint layout, movement zones, stops, and operability must be verified. The design must be visually integrated into the grid. Maintenance access and serviceability must be ensured.
Module: Acceptance and Documentation: An acceptance checklist, maintenance instructions, and photographic documentation must be provided upon acceptance. Visible surfaces must be inspected for uniformity, grid pattern, joint pattern, and a defect-free surface. Any deviations must be corrected before handover.
rotec Project Workflow: More Structure, Less Risk
If you bring rotec on board early, you’ll not only get installation services but also a clear project workflow. This is important in a B2B environment because deadlines and interfaces must be reliable. In addition, decisions are documented, which reduces the risk of misunderstandings.
Project Roles: Who Does What in the Process?
rotec operates with clearly defined roles and responsibilities. There is a technical project coordination team that manages details and interfaces. There is a production coordination team that ensures approvals and delivery logistics. And there is an installation coordination team that structures the workflow, safety, and acceptance procedures. This keeps your project under control and ensures that decisions are transparent.
Installation Throughout Germany: Process and Interfaces
Installed by Rotec
Related Links to LINARTE
If you want to dive deeper into the topic, you'll find relevant articles and resources here. This gives readers more context, and at the same time, you strengthen internal linking.
- LINARTE Facades and Wall Cladding: An Overview at rotec
- LINARTE Posts on the rotec Blog, Category Overview
- LINARTE Day: All Posts at a Glance
- LINARTE Façade with Integrated LED Lighting, Real-World Example
- LINARTE Installation: An Overview of the Process and Implementation
- LINARTE Wall Cladding, Integration of Gates and Doors
- LINARTE Project in Berlin: Reference and Impact
- Project Review and Inquiry to rotec—Go Directly to the Form
- Certificates and Quality Certifications from rotec
- LINARTE Product Overview, Official Website


 EN
EN  DE
DE  ES
ES  FR
FR  IT
IT  NL
NL  PL
PL  TR
TR
0 Comments